The art of facial hair by a makeup artist can instantly take an audience from the present to the past. Take for example the film "Topsy Turvey" which won an Oscar for makeup a few years ago; or this year's mini-series "John Adams," which won an Emmy for makeup. In both cases the actors are subtly transformed into absolutely believable characters of the past.
But facial hair is not just for period films. For the past ten years men have been sporting facial hair in various fashions: goatees, "soul patches," mustaches, longer sideburns, and beards. You are hard pressed to walk two blocks on a busy street and not see men with some sort of facial hair.
Be careful of the little film or television project you are about to do that is just going to have "straight" makeup. You may find your actor with his own goatee and a scene where his stuntman is hit by a car, later has a photo double because of two units working at once, and now your "straight" makeup is into hair and curling irons.
It is often said that even a poorly laid beard can look believable because of great dressing. The use of curling irons (tongs in Europe) can add great realism to what would otherwise just be straight hair. Curling the laid facial hair to form to the face, and work smoothly into the sideburns is the most realistic answer to hair laying.
Let's discuss the curling iron. The iron is composed of a lip (the long curved portion), the tongue (the long round portion that fits into the lip), and the two handles on the ends.
The process starts with a curling iron stove and various size curling irons. The curling iron (lip and tongue) is placed into the opening (throat) of the stove to heat the iron to the proper temperature. After becoming experienced with your curling iron and stove you will be able to know when the iron is "not hot enough," or "too hot," by the amount of heat radiating from the iron.
If you are just starting off with a curling iron, I suggest testing the heated iron on a small amount of hair from your table. Place the hair between the lip and the tongue and lightly close the iron. The hair should bend in the shape of the iron and remain that way when you open the iron. However, if the hair remains straight, the iron is not hot enough...if the hair sizzles, smokes and turns yellow it is too hot. Another way of testing for proper heat is using a tissue. Following the same process, if the tissue shows a bend you are probably about right, if the tissue turns brown you are too hot, and if the tissue bursts into flames you are way too hot.
To hold the iron properly, lay the handles of the iron in the palm of your hand with the lip at the top. Your little finger will control the lower handle and your thumb will control the upper handle. Now by moving the remaining three fingers up and down, you can open and close the iron.
Once the iron is to the proper temperature you are ready to start curling. In almost all cases, you will open the curling iron a small amount and then place the tongue of the iron under the hair to be curled. By bringing the lip down over the hair and onto the tongue you will begin causing the hair to bend and curl. At this point it is very important that you do not just clamp the iron completely, or you will end up with a solid hook - not realistic. Instead, keep opening and slightly closing the iron, constantly moving it; while at the same time rolling your hand under to rotate the curling iron in the direction you want the hair to curl. When you have completed the rotation of your hand, slightly open and remove the iron from the hair. Repeat the process. Every time you curl the hair, make sure you are turning the chin area your iron will usually be horizontal; when working on the sides of the face the iron will be more of a partial vertical direction.
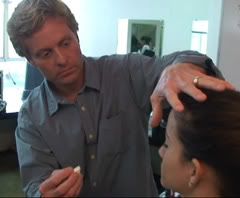
When the curling iron is heated to the proper temperature it is very, very hot! If not careful, will it burn the skin? You bet...and blister! Therefore, when learning to use a curling iron start with an artificial head. (These heads are usually referred to as "Tuffy heads," even though they haven't been made from "Tuffy" for years). You can either lay hair on the head and then use your curling iron, or use a lace (ventilated) piece pinned to the "Tuffy Head." I prefer a lace piece because you can practice curling over and over on the same piece. After curling, dampen the hair and comb out the curl, dry, and start practicing again. (Purchase a ventilated piece that is inexpensive. Possibly something that is made for Halloween sales, but has a realistic shape and density of hair).
WAYS TO PROTECT THE SKIN WHEN CURLING HAIR
Always, always make sure when placing the tongue of the iron into the hair that you can see exactly where the tongue is and that there is a safe distance from the skin. The tongue and lip must always be visible and safe.
A wide tooth comb can be a very helpful partner tool when curling (dressing) facial hair:
1.) Use the comb to pick up the hair always from the face so you can see between the comb and the face. Carefully move the tongue of the iron in place remaining a safe distance from the skin and begin curling. At all times, the tongue and lip must be completely visible to you.
2.) Slide the teeth of the wide tooth comb through the hair and hold the comb against the skin. This will keep the iron from touching the skin as long as you keep the iron in line with the comb.
TIPS I HAVE LEARNED:
1.) After laying a beard, curling underneath the chin is difficult because you have to contort your body and arms, and still insure safety. Instead, I curl the hair first. Using my iron, I marcel the hair. Hold the hair at one end and starting at the other end: clamp the hot curling iron lip-down over the hair and bend the hair around the iron. Remove the iron. Now reverse the iron and clamp the iron lip-up over the hair and bend the hair around the iron. Continuing this will create a very strong wave. Attempt to keep a similar wave all the way to the end. After the group of hair is completely marceled, blend the hair by pulling the hair from each side, trying to keep the hair all the same length.
Now you are ready to lay the hair. Cut the bundle in half and apply under the chin in the normal manner. When the beard is completely laid and curled you will probably not have to do any curling under the chin - just final shaping with the scissors.
2.) Set the curl in facial hair by using paraffin when dressing. As you curl the hair, run the tongue of the curling iron over a small block of paraffin. AS the paraffin cools on the hair it will hold the beard in place. This is especially good when curling mustaches.
3.) For a spray that will hold facial hair and not suffocate everyone in the trailer, try "Whiskers" by Reel Creations. Just spray this water-based formulation and wait for it to dry.
4.) A trick I was privileged to learn from Perc Westmore, a master of hair and just about everything makeup: when dressing a large character mustache to look rugged and not manicured, complete the iron dressing and then take an item, like a cigarette or a too hot curling iron, and burn/singe the hair into shape above the lip line. (I suggest doing this before applying the mustache to the actor.) This gives a wonderful finish look of broken, worn, gnarly hair and completes your character.
You can create magic with your curling iron!
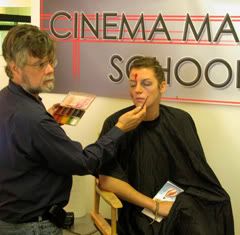
Director of Education, Cinema Makeup School
Makeup Artist and Hairstylist Branch Governor for the Academy of Motion Picture Arts and Sciences.


